
How to Integrate with TradeBox
This page will help you integrate your TradeBox account with StoreFeeder
Integrating StoreFeeder with TradeBox is a simple process. Just follow the instructions below and you should be up and running in no time.
Step by Step
Step 1.
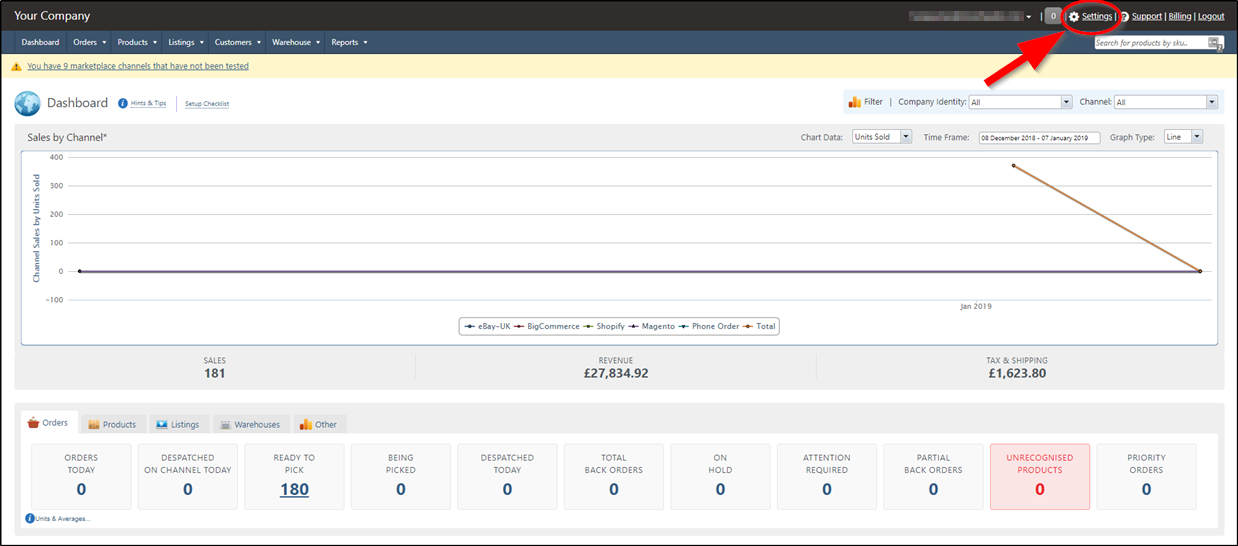
First, sign into StoreFeeder using your login details. You will then be brought to the 'Dashboard'. Look to the top right of this page and you will see a 'Settings' option with a cog next to it; click that.
Step 2.
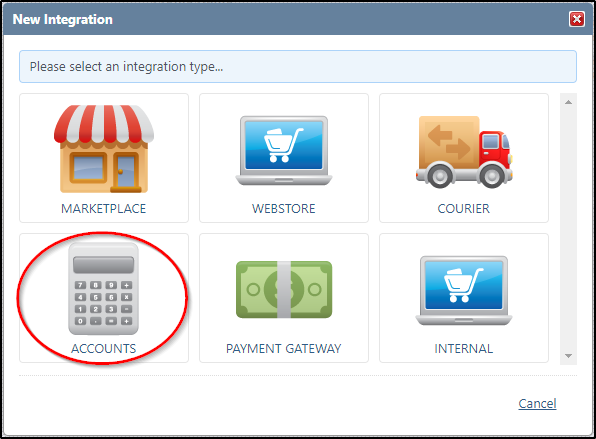
You will now see the 'Integration Manager' page and a list of all of your channels.
To create an integration with TradeBox, look to the top right of the Integration Manager page and click the green button marked "+ New Integration".

Step 3.
You will then be greeted by the following screens where you will need to pick the circled options.

You will then be asked to input a name for the integration. Once you have finished, click the '+Add Integration' to proceed.
You will now see the 'Integration Details' page for this channel. In the 'Integration Profile Section' you can edit your Profile Name, select a Company Identity and set the 'Connection Type'
Step 4.
The Tradebox integration in StoreFeeder comes with a pre-configured file definition for exporting your files. You can then select which 'Company Identity' you want to export information for; the 'Default Date Type' and 'Order Statuses To Export' fields you will need to check to make sure the data you are going to export is suited to you.
- Default Date Type - Whether you would like the dates on your exported orders to appear as the date the order was placed or the date the order was despatched
- Order Statuses to Export - Decide whether you would only like certain orders exported (e.g. Only orders marked as despatched).
A little further down you'll see the options for how you would prefer to export the data. Again you will need to set these options to what suits you.
- Export Repeated Information - Whether you would like tokens such as 'Order Total' to appear on each line of Multi-line Orders.
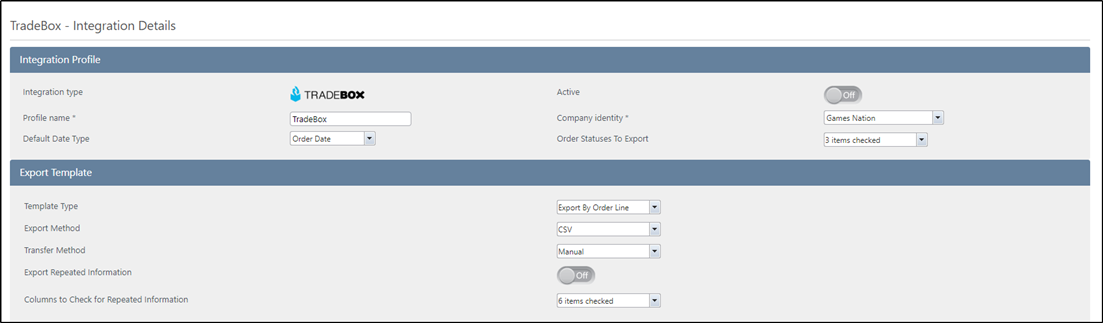
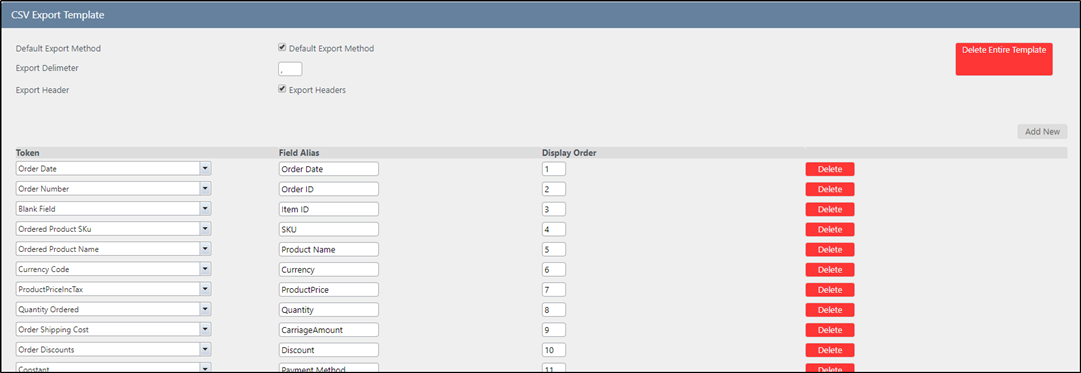
Although it is already pre-set for the Tradebox export, you can make any changes you need to the export template should you need to.
Step 5.
To get the export file, first look to the navigation bar on the left hand side of the page. click on 'Export Accounts File'
First, set the date range you want to export from and double check that your 'Export Order Status' list is correct.
You'll also see there's the option to 'Export Information From All Company Identities' if you have more than one and don't want to keep the identities finances separate.
Finally, choose if you want to 'Include Already Exported Orders' then click the 'Export' button circled below.

Congratulations! You have now set up a TradeBox integration and have completed your first data export.
Comments
0 comments
Please sign in to leave a comment.