
Currently, our NOTHS integration enables you to:
- Download your NOTHS orders
- Send shipping updates to NOTHS
Integrating StoreFeeder with your NOTHS marketplace is a simple process. Just follow the instructions below and you should be up and running in no time.
Step by Step Guide
Step 1.
First, sign into StoreFeeder using your login details. You will then be brought to the 'Dashboard' and will see a yellow bar at the top of the page indicating that you have sales channels that have not been tested. To begin the integration, click on the link in the yellow bar.
If this yellow bar doesn't appear on your dashboard then look to the top right of the page for 'Settings' then click 'Your Integrations'.

Step 2.
You will now see the 'Integration Manager' page and a list of all of your channels. To integrate your NOTHS channel, click on 'Edit/View Integration'. If NOTHS does not already appear on this list then you will need to set up a new integration for it; you can do this by clicking the green button marked '+ New Integration'.
Step 3.
If you are editing an already existing integration, you can skip this step.
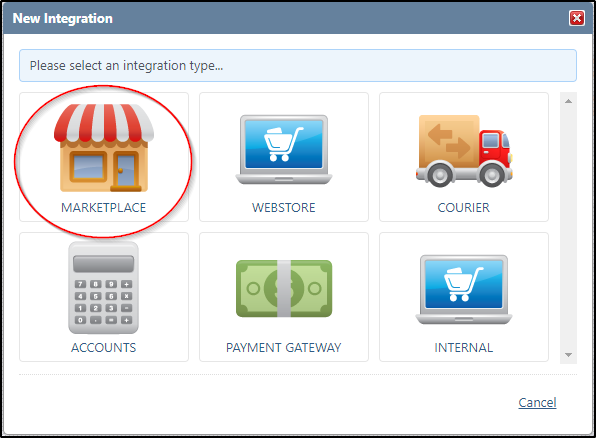
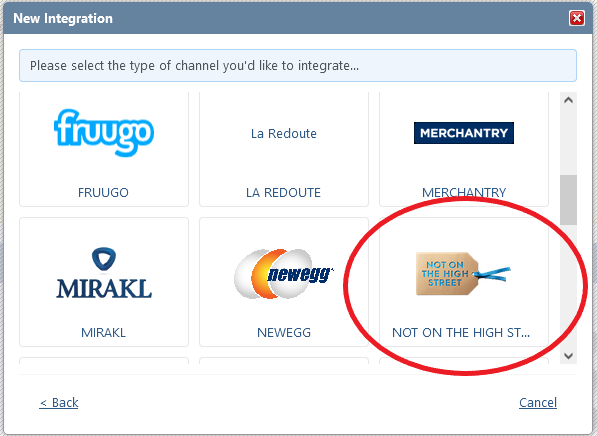
If you are creating a new integration you will then be greeted by the following screens where you will need to pick the circled options.
You will then be asked to input a name for the integration and if you wish to extend permissions to all users on your account. Once you have finished, click the '+Add Integration' to proceed.
Step 4.
Now, in order to link StoreFeeder to your NOTHS account, we will need your API Auth Token.
To obtain these credentials go to your NOTHS admin dashboard, you can do this by clicking here. Once on your dashboard, navigate to the 'Settings' section from the top menu, then click 'API Tokens' on the left-hand side. This will then give you the option to 'Generate Token' that can be used inside StoreFeeder, see the image below.
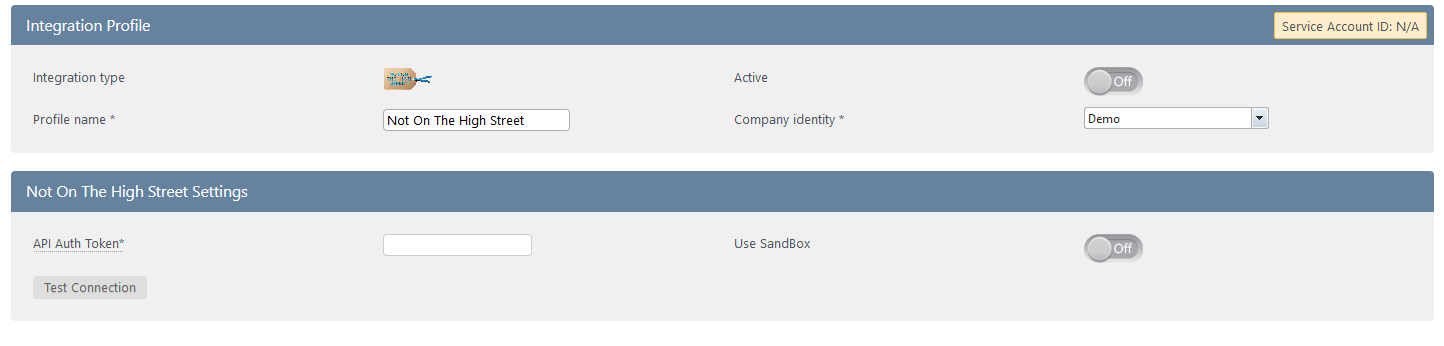
Once you have entered these details, Save your integration and you should be able to start using your NOTHS store.
Finishing Up.
Before you go live, don't forget to adjust your channel settings to your needs. Each option provides an explanation as to what it does when you scroll over it.
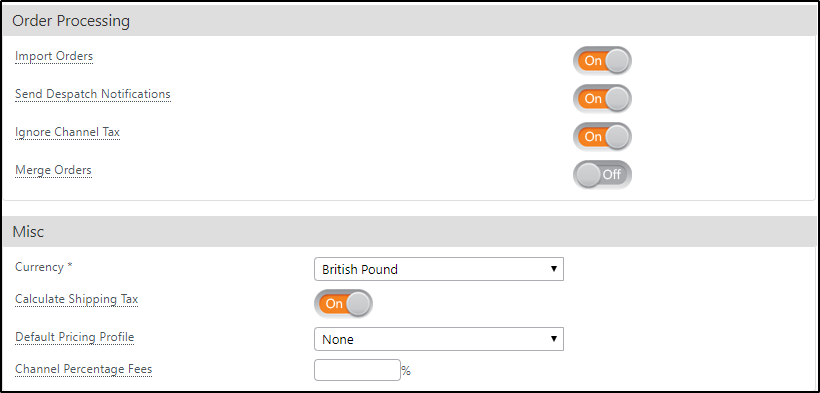
Once you are happy that everything is set up correctly all that's left to do is switch the active button to 'On' and click 'Save' at the bottom of the page.

That's everything! Your NOTHS integration is now live and ready to use.
Comments
0 comments
Please sign in to leave a comment.