
Adding a New Warehouse
This will help you set up your warehouses on StoreFeeder
Warehouses are a digital representation of your company's warehouses. They play a big part in keeping track of stock and help optimise order turn around time by increasing picking efficiency.
Creating a warehouse on StoreFeeder is a very simple process. Simply follow the step by step guide below and you'll have your first warehouse created in no time.
Creating a Warehouse.
Step 1.
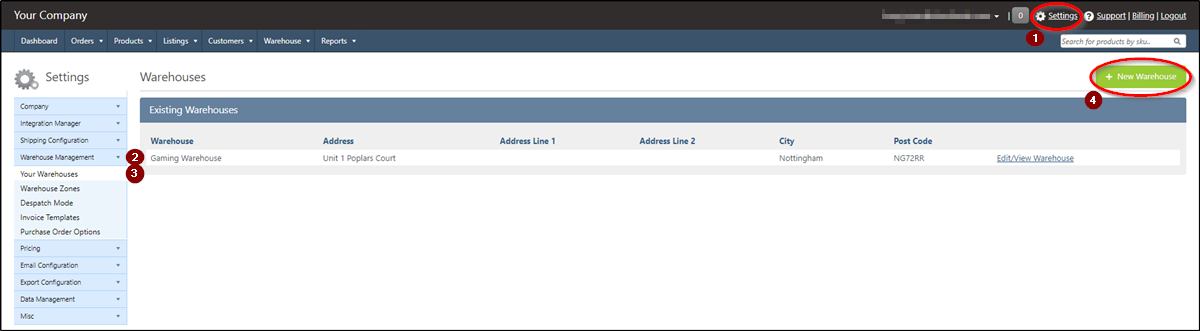
To add a warehouse to StoreFeeder, first click 'Settings' in the top right corner. Select 'Warehouse Management' > 'Your Warehouses' from the menu on the left.
You will be taken to the 'Warehouses' page. Any warehouses added into StoreFeeder will appear here.
To add a new warehouse, click the 'New Warehouse' button.
Step 2.
On the 'Warehouse Information' page, you can enter all relevant information regarding your new warehouse. You will also be able to set the handling time it takes for your supplier to get stock to you, and grant permission to see the warehouse to all users if you wish.
You will also need to select the warehouse type as either:
- Warehouse Fulfilment
- Drop Shipment
- Amazon Fulfilment
- Auto Dropship
- Dropship Supplier
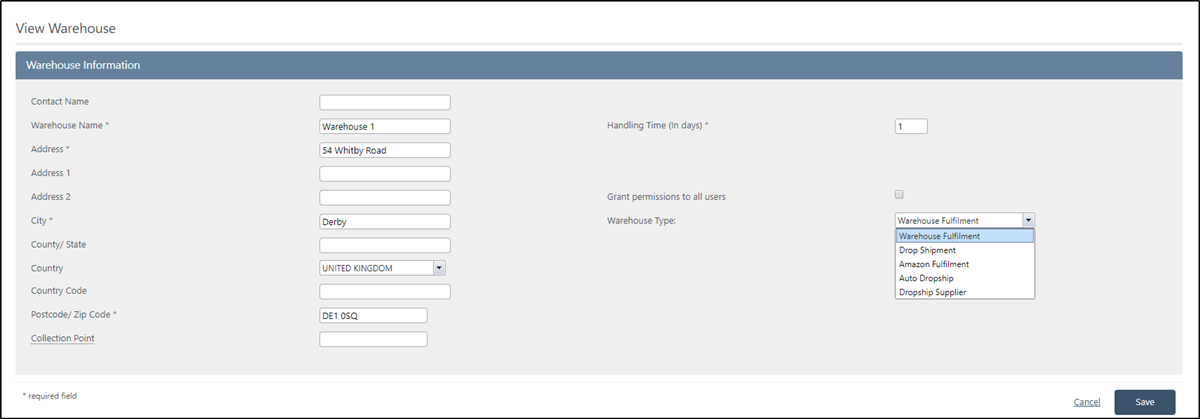
Click the 'Save' button at the bottom of the page to complete the process.
Congratulations! You've created a warehouse on StoreFeeder.
If you want to map out your warehouse into zones of pickbins then you'll be wanting to create 'Warehouse Zones'. A helpful guide on how to do this can be found here.
Alternatively if you would prefer to skip mapping your warehouse out and go straight to assigning stock locations then you'll be wanting this article here.
Comments
0 comments
Please sign in to leave a comment.